Cassava Farming in Nigeria (2026): Everything You Need to Know Before You Start

Expectativas para o mercado de mandioca em 2020 - MF Magazine

Nigeria is the largest producer of cassava in the world, accounting for a significant share of global production. According to the Food and Agriculture Organization (FAO), the country produces more than 60 million metric tonnes of cassava annually, ahead of countries such as the Democratic Republic of Congo, Thailand, Ghana, Brazil, and Indonesia.

As the world’s largest producer of cassava, Nigeria has a strong and growing demand for fresh roots and processed products such as garri, high-quality cassava flour (HQCF), starch, ethanol, animal feed, and industrial raw materials. Yet, many farmers still struggle to maximise the full value of their harvest due to poor planning, limited access to processing facilities, post-harvest losses, and unreliable markets.

Whether you’re a first-time farmer, a commercial producer, a cooperative, an agro-processor, or an agribusiness investor, this guide provides practical, up-to-date information on cassava farming in Nigeria; from land preparation and planting to harvesting, processing, marketing, and profitability.

What is Cassava Farming? 

Cassava farming is the cultivation of Manihot esculenta, a tropical root crop grown primarily for its starchy tuberous roots. It is one of the most widely cultivated crops in Africa and serves as a staple food for millions of households while supporting numerous agro-industries.

Unlike many annual crops, cassava is propagated using healthy stem cuttings rather than seeds. Its ability to tolerate periods of drought, thrive in diverse soil conditions, and produce multiple value-added products has made it one of Nigeria’s most economically important crops.

Today, cassava supports food production, industrial manufacturing, livestock feed production, biofuel development, and rural livelihoods across the country.

Why Cassava Farming is Important

Cassava farming plays a critical role in strengthening Nigeria’s agricultural sector by supporting food security, creating employment, and supplying raw materials to several industries.

As global demand for cassava-based products continues to rise, farmers who adopt improved production practices and participate in value-added activities stand to benefit from stronger market opportunities and increased profitability.

Beyond production, cassava contributes significantly to Nigeria’s rural economy by creating opportunities across the entire value chain; from cultivation and processing to transportation, aggregation, storage, marketing, and export.

Benefits of Cassava Farming

1. Strengthens Food Security

Cassava remains one of Nigeria’s most important staple foods and provides a reliable source of carbohydrates for millions of households throughout the year.

2. Creates Multiple Income Streams

Farmers can earn income not only from fresh cassava roots but also from processed products including:

  • Garri
  • High-Quality Cassava Flour (HQCF)
  • Cassava starch
  • Cassava chips
  • Animal feed
  • Ethanol

Diversifying into processing often increases profitability while reducing post-harvest losses.

3. Supports Industrial Growth

Cassava serves as an essential raw material for several industries, including:

  • Food manufacturing
  • Pharmaceutical production
  • Livestock feed
  • Brewing
  • Adhesives
  • Textile manufacturing
  • Biofuel production

This broad industrial demand helps sustain a strong market for cassava products.

4. Creates Jobs Across the Value Chain

Cassava farming generates employment opportunities in:

  • Production
  • Processing
  • Equipment fabrication
  • Transportation
  • Commodity aggregation
  • Marketing
  • Storage
  • Export logistics

Every stage of the cassava value chain contributes to rural economic development.

5. Offers Strong Export Potential

Processed cassava products continue to gain acceptance in regional and international markets, creating opportunities for farmers and processors who consistently meet quality standards.

Overview of the Cassava Farming Process

Each stage of the cassava value chain presents opportunities to improve productivity, reduce losses, and increase profitability. Understanding these stages can help farmers make better decisions from planting to market.

1. Land Selection

Selecting the right land is the foundation of a successful cassava farm.

Cassava performs best in fertile, well-drained sandy loam or loamy soils with adequate sunlight and easy access to roads, processing centres, or markets. Avoid waterlogged or poorly drained areas, as excess moisture can hinder root development, encourage diseases, and reduce yields.

Quick Tip

If possible, conduct a soil test before planting to determine nutrient levels and soil pH. This helps guide fertilizer application and improve productivity.

2. Planting

Use healthy, disease-free stem cuttings sourced from improved cassava varieties suitable for your location and intended market.

Plant at the onset of the rainy season when soil moisture is sufficient for early establishment. The recommended spacing of 1 metre × 1 metre allows adequate room for root development, easier field management, and higher yields.

Common Mistake

Using old or diseased stem cuttings can significantly reduce germination rates and overall productivity.

3. Farm Management

The first few months after planting are critical to the success of your cassava farm.

Regular weeding, proper soil fertility management, and timely pest and disease control help young plants establish quickly and compete effectively for nutrients, water, and sunlight.

Routine field inspections also allow farmers to identify problems early before they become costly.

Expert Insight

Consistent farm management often has a greater impact on yield than simply increasing the size of the farm.

4. Harvesting

Most improved cassava varieties mature between 8 and 18 months, depending on the variety and intended use.

Harvesting at the appropriate time helps maximise root quality, starch content, and market value while reducing the risk of deterioration.

If cassava is intended for industrial processing, harvesting schedules should align with buyer or processor requirements.

5. Processing

Cassava roots begin to deteriorate within 24–72 hours after harvest, making timely processing essential.

Processing cassava into products such as:

  • Garri
  • High-Quality Cassava Flour (HQCF)
  • Cassava starch
  • Cassava chips
  • Animal feed

not only reduces post-harvest losses but also creates additional income opportunities and expands market access.

Farm Warehouse Insight

Investing in processing helps farmers retain more value from every harvest while reducing waste.

6. Marketing

Successful cassava farming begins with the market in mind.

Rather than waiting until harvest to look for buyers, farmers should identify potential markets before planting. This improves planning and reduces the likelihood of distress sales.

Potential buyers include:

  • Commodity aggregators
  • Food processors
  • Cooperatives
  • Industrial manufacturers
  • Institutional buyers
  • Export markets (where applicable)

Best Practice

Know who you’re growing for before the first stem cutting goes into the ground.

Frequently Asked Questions About Cassava Farming in Nigeria

1. How do you plant cassava?

Cassava is planted using healthy stem cuttings about 20–25 cm long, sourced from mature, disease-free plants. Plant at the beginning of the rainy season using a spacing of 1 metre × 1 metre.

2. What is the best month to plant cassava in Nigeria?

The ideal planting period is at the start of the rainy season; typically March to May in southern Nigeria and May to June across many northern states.

Expert Tip
Monitor weather forecasts before planting, especially in areas where rainfall patterns are becoming less predictable.

3. How long does cassava take to mature?

Most cassava varieties mature within 8–18 months, depending on the variety and intended use.

Early-maturing varieties are typically harvested after 8–10 months, while many improved commercial varieties perform best between 10–12 months. Cassava intended for industrial processing may remain in the field longer to achieve higher starch content.

4. What is the recommended spacing for cassava?

The recommended spacing is 1 metre × 1 metre, giving approximately 10,000 plants per hectare.

Spacing Plants per Hectare
1 m × 1 m Approximately 10,000

5. How many cassava stems are needed for one hectare?

A one-hectare cassava farm requires approximately 10,000 healthy stem cuttings.

To achieve good establishment and maximise productivity, farmers should source certified, disease-free planting materials from reputable suppliers.

6. Which cassava variety is best in Nigeria?

Popular improved varieties include TME 419, TMS 30572, and Game Changer.

These varieties are known for high yields, disease resistance, and strong processing qualities. However, the best choice depends on your location, soil type, climate, and target market.

7. Which fertilizer is best for cassava?

The best fertilizer depends on your soil. A soil test is the most reliable way to determine nutrient requirements.

Where soil testing is unavailable, many farmers apply balanced NPK fertilizer alongside organic manure to support healthy root development and improve yields.

Best Practice
Avoid applying fertilizer without understanding your soil’s nutrient needs, as over-application can reduce profitability.

8. What is the average yield of cassava per hectare?

Traditional varieties typically yield 10–15 tonnes per hectare, while improved varieties under good management can produce 25–40 tonnes per hectare or more.

Production System Average Yield
Traditional varieties 10–15 tonnes/ha
Improved varieties 25–40+ tonnes/ha

9. Is cassava farming profitable in Nigeria?

Yes. Cassava farming can be highly profitable when farmers combine good agronomic practices with value addition and reliable market access.

Demand comes from households, food processors, livestock feed manufacturers, breweries, pharmaceutical companies, and other industries. Farmers who process their cassava or secure buyers before harvest generally achieve better returns than those selling fresh roots alone.

Farm Warehouse Insight
Profitability increases when farmers plan beyond production by considering processing, storage, and market opportunities.

10. Where can I sell cassava in Nigeria?

Farmers can sell cassava to local traders, commodity aggregators, processors, cooperatives, food manufacturers, livestock feed producers, institutional buyers, and export markets where applicable.

Identifying buyers before harvest helps reduce post-harvest losses and improves price negotiation.

Best Practice
Build relationships with buyers early to improve planning and reduce the pressure to sell immediately after harvest.

How Farm Warehouse Helps Cassava Farmers Succeed

Successful cassava farming doesn’t end with a good harvest. Long-term profitability depends on what happens after production; from processing and storage to market access, financing, and value addition.

These are some of the biggest challenges many farmers face, and they’re also where the greatest opportunities exist.

Our work is to strengthen the cassava value chain by connecting farmers, cooperatives, processors, and agribusinesses with the infrastructure and support they need to grow more resilient and profitable enterprises.

Processing That Adds Value

Fresh cassava roots deteriorate rapidly after harvest, making timely processing essential.

Through our community-based processing hubs, farmers and processors can access modern equipment to produce value-added products such as:

  • Garri
  • High-Quality Cassava Flour (HQCF)
  • Cassava starch
  • Cassava chips
  • Animal feed

Processing not only reduces post-harvest losses but also improves product quality, increases shelf life, and opens access to higher-value markets.

Stronger Market Access

Finding reliable buyers can be just as challenging as producing a good harvest.

We support commodity aggregation and connect producers with commercial buyers, helping farmers access larger and more structured markets while reducing the pressure to sell immediately after harvest.

This creates better opportunities for improved pricing and more consistent income.

Access to Finance

Many farmers and processors have viable businesses but limited access to the capital needed to expand.

Working alongside strategic financial partners, we help improve access to financing that enables farmers, cooperatives, and agribusinesses to invest in productive assets and scale their operations sustainably.

Through our partnership with Volta Series, communities can also access Nigerian-built processing equipment through flexible financing pathways.

Building Farmer Capacity

Infrastructure alone is not enough.

We also support farmers through training, technical guidance, and agribusiness capacity building, helping them adopt improved production practices, strengthen post-harvest management, and make informed business decisions.

Knowledge is one of the most valuable investments a farmer can make.

A Stronger Cassava Value Chain Starts with Collaboration

Cassava farming is most profitable when production is supported by processing, financing, reliable markets, and continuous learning.

By bringing these elements together, we help farmers move beyond simply producing cassava to building stronger, more resilient agribusinesses that create lasting value for communities and the wider agricultural sector.

Ready to Grow Your Cassava Business?

Whether you’re an individual farmer, cooperative, processor, or agribusiness investor, we are committed to helping you unlock greater value across the cassava value chain.

Our solutions include:

✅ Community Processing Hubs

✅ Commodity Aggregation

✅ Storage Solutions

✅ Mechanisation Support

✅ Farmer Training

✅ Market Linkages

✅ Strategic Financing Opportunities

Ready to take the next step?

Contact Farm Warehouse today to learn how we can support your cassava farming or processing journey.

Step by Step Soya Beans Production in Nigeria

By Iyorkaa Nater


Land preparation

  • Clear all vegetation before seedbed
  • Prepare seedbed manually with a hoe or animal-drawn implement or tractor to ensures good germination and reduces weed infestation

Choice of variety

  • Choose a variety suited to your agro-ecological zone
  • Selection should be done based on the time to maturity
  • Selection should be done yield potential
  • Selection should be done susceptibility to stem lodging
  • Selection should be done resistance to pests and diseases

Varieties characteristics

  • TGX 1448-2E Southern and Northern Guinea savanna, Late maturing, high yield (1.5 t/ha)
  • TGX 1951-3F Southern and Northern Guinea savanna, Medium maturing, high yield, high yielding (2.5 t/ha)
  • TGX 1904-6F Southern and Northern Guinea savanna, Medium maturing, high yield (1.5 – 2 t/ha)
  • TGX 1835-10E Sudan savanna, Early maturing, average yield, high yielding (1.5–2 t/ha)

Seed Sourcing

  • Do not purchase seeds from the open market
  • Always buy seeds from verified seed companies or the seed producers nearest to you

Date of planting

  • Do not plant too early (before the establishment of rain) because a prolonged dry spell after planting may result in permanent wilting of the crop
  • Late planting, on the other hand, may expose the crop to attack by some late-season pests and deprive the crop of sufficient moisture if the rains stop early


Recommended dates for planting soybean in Nigeria

  • Moist savanna/Southern Guinea savanna Early June–early July
  • Northern Guinea–Sudan savanna Mid-June–early July
  • Sudan savanna Weeks 1–2 in July


Seed rate

  • About 50–70 kg (20–28 standard mudus) are required to obtain a population of 444,444 plants/ha


Seed dressing

  • Treat seeds with fungicides, such as Apron Plus, or Thiram, before planting, at the rate of 1 sachet/8 kg of seeds for protection against soil-borne fungal diseases


Plant spacing and sowing

  • Sow soybean by hand, planter, or by drilling
  • Plant 3 to 4 seeds/hole at a spacing of 75 cm between rows and 10 cm between stands
  • Alternatively, drill seeds at 50–75 cm between rows and 5 cm within rows
  • For the early maturing varieties, a spacing of 50 cm between rows and 5–10 cm within rows
  • Do not sow seeds more than 2–5 cm deep


Fertilizer

  • A good fertilizer recommendation for soybean production depends on a good soil test
  • Under normal conditions, soybean should provide itself with nitrogen through biological nitrogen fixation
  • Until nodulation occurs, the soybean plant depends on soil nitrogen for growth
  • Apply a mixture of 2 – 3 bags of NPK 15:15:15 in addition to 2 bags of SSP fertilizers
  • Apply fertilizer on or not later than 7 days after planting


Soybean Inoculation using NoduMax for higher yield

  • To enhance the ability of soybean to form nodules and fix nitrogen, soybean seeds need to be inoculated with Rhizobia


How to inoculate soybean with NoduMax

  • Measure 10 kg of soybean
  • Place the amount in any container that will accommodate the seeds
  • Prepare the sticker. Dissolve the content of the enclosed packet of gum Arabic into 200 ml of warm water
  • Apply the sticker to 10 kg of soybean seeds and mix them until uniformly coated
  • Add 100g of inoculants (1 sachet of NoduMax) to the seeds and mix until seeds are uniformly covered
  • Cover the inoculated seeds with a cloth and put it under the shade for the sticker to set
  • Plant the seeds on the same day that you inoculate them
  • Plant the inoculated seeds in a well-prepared moist soil and cover immediately


Weeds control

  • A properly timed weed control program can minimize their effects
  • Weed control in soybean could be achieved manually or with the use of chemicals or by a combination of both methods


Manual weed control

  • Carry out the first weeding at 2 weeks after planting and the second at 5–6 weeks after planting


Chemical weed control

  • The choice, however, depends on the predominant weed species and the availability of the herbicide
  • Herbicides are available for pre-emergence or post-emergence weed control
  • If the herbicide is applied at planting, one weeding may be required at 5–6 weeks after planting
  • For pre-emergence weed control (Mix Glyphosate with Pendimethalin or Dual Gold) in a ratio of 150mils for Glyphosate, 200 – 250 mils for Pendimethalin and 150 – 200 mils for Dual Gold all in 20 litre knapsack and spray within 24 hours after sowing
  • For post emergence weed control (use Raptor or IRIS at 1.5 – 2 litres per hectare when the plants are 19 – 21 days after planting


Insect’s pest control

  • Insect pests can be controlled with a single spray of Cypermethrin + Dimethoate at flowering stage


Harvesting

  • At maturity, the pod is straw- coloured
  • Harvesting of soybean is recommended when about 85% of the pods have turned brown for a non-shattering variety but 80% for shattering varieties
  • The crop can be harvested when the seeds are at the hard-dough stage
  • The seed moisture content is between 14 and 16%
  • Harvesting can be done with a cutlass, a hoe, sickles or mechanized operation
  • Cut the mature plants at ground level
  • Stack them loosely on tarpaulin and allow them to dry in the open for 2 weeks before threshing
  • Do not harvest by hand-pulling because this may deprive the soil of nutrients added by the crop


Threshing soybean

  • Thresh manually or mechanically when the plants are properly dried and as soon as possible


Storage

  • Dry to 12% moisture for storage of 6–12 months and to 10–11% for longer storage
  • Place bags of clean soybean on a rack in the cold room or in ambient store

Step by Step Maize Production in Nigeria

By Iyorkaa Nater


Site Selection

Select a well drained loamy soil for maize production


Land preparation

For high grain yield, maize should be sown in well prepared ridges 75 cm apart. This can be done using animal-drawn implements can be used for preparing ridges, or these can be made by hand, hoe, or tractor mounted tillage equipment


Planting date

Planting should be done as soon as the rains are established and preferably immediately after a good rain. The establishment of rains varies according to the different ecological zones and from one year to another. However, optimal planting dates in the major ecological zones in northern Nigeria usually lie within the following ranges:

  • Sudan savanna: first – second week of July.
  • Northern Guinea savanna: last week in June to the first week in July.
  • Southern Guinea savanna: mid-May to the second week in June.

However, where early and extra-early maturing varieties are not to be eaten green, planting may be adjusted in the southern parts of the State to mid-July to allow maturity to coincide with the onset of the dry season.


Maize varieties

Maize hybrids recommended for northern Nigeria

Ecology Hybrids Remarks
Northern Guinea and

Sudan savannas

P48W03 Prolific, combines host plant resistance to Striga and tolerance to Metsulfuron methyl (MSM) for Striga control (4.5 t/ha).
Guinea Savanna DK777


High grain yield, good stay-green characteristics, and tolerance to S. hermonthica (10.9 t/ha).
  SC719 High yield and large grain size (12 t/ha).
  SC651 Tolerance to drought and S. hermonthica. High yield potential and good husk cover (9.7 t/ha).
Guinea savanna and

Forest Ecology

30Y87 High yield, excellent stay-green characteristics, uniform ear placement and good standability (12.0 t/ha).


Open-pollinated maize varieties (OPV) recommended for northern Nigeria

Ecology Varieties Remarks
Southern Guinea

savanna

SAMMAZ 15 (IWDC2Syn-F2-W)

SAMMAZ 40 (DTSTR-Y SYN2)

SAMMAZ 51 (IWD C3 SYN/DTSTR)

Use in areas where drought

and Striga are problems

Northern Guinea

savanna

SAMMAZ 15 (IWDC2Syn-F2-W)

SAMMAZ 27 (EV 99DT-W-STR)

SAMMAZ 40 (DTSTR-Y SYN2)

SAMMAZ 48 (2011 TZE W-DT)

SAMMAZ 51 (IWD C3 SYN/DTSTR)

Use in areas where drought

and Striga are problems

Sudan savanna SAMMAZ 27 (EV 99DT-W-STR)

SAMMAZ 48 (2011 TZE W-DT)

SAMMAZ 32 (99 TZEE-STR-QPM)

Use in drought-prone areas and areas with a short season. Where Striga is a problem, use extra-early and drought escape varieties


Spacing and planting

The plant spacing recommended for maize in the Nigerian savannas is 75 × 50 cm, where 2 plants per stand are adopted


Seed rate

About 15–20 kg of maize seeds is required to plant a hectare, which is about 2½ acres. Plant 3 seeds per hole and later thin the stand to 2 plants at about 1–2 weeks after germination


Fertilizer application for OPVs

The recommended fertilizer rate should be applied in two split applications. The first dose (that is 50:50:50) should be applied at planting or within the first week of planting using about 6 bags of NPK 15-15-15.

The second dose of N (50 kg, about 2 bags of urea) should be applied between 4 and 5 weeks after planting in the Southern and Northern Guinea savanna zones, but between 3 and 4 weeks after planting for extra-early varieties in the Sudan savanna


Fertilizer application for Hybrids

The recommended fertilizer rate should be applied in three split applications.

The first dose should be applied at planting or within the first week of planting using about 8 bags of NPK 15-15-15.

The second dose of N (50 kg, about 2 bags of urea) should be applied between 4 and 5 weeks after planting

The third dose of N (50 kg, about 2 bags of urea) should be applied between 7 weeks after planting


All fertilizers should be buried during application. Ensure that the second weeding has been conducted before the second fertilizer dose is applied.

Note that delay in the application of the first dose of fertilizer beyond week 1 after planting will drastically reduce the grain yield of early and extra-early varieties. Also, the second dose should not be delayed beyond 4 weeks after planting. Fertilizer should be applied in small quantities of 2 coca cola caps filled with NPK 1 week after planting.

One coca cola cap filled with urea should be applied at 4 weeks after planting. The fertilizer should be poured into a hole made with a stick at a distance of about 5–8 cm away from the maize plant and below the soil surface. Do not leave applied fertilizers exposed on the soil surface. Always cover applied fertilizer with soil.


Weed control

Manual weed control: Two manual weeding is recommended to be conducted at 2 weeks and 4–5 weeks after planting. In areas where Imperata cylindrica is a problem, weeding may start as early as 2 or 3 weeks after planting and more than 2 manual weeding may be required.

Chemical weed control: The increasing problem of lack of appropriate labor has increased the adoption of chemical weed control. The herbicide recommendation provided in Table below is for both large scale and peasant farmers.

Chemical weed control in maize

Product Rate/ha Condition of use
Glyphosate 4 liters Before land preparation
Primextra Gold 3–4 liters Apply immediately after planting or the following day. Up to 4 liters/ha is recommended for the forest transition zone
Dual Gold 960 EC 0.6–1.6 liters Apply immediately after planting or the day after planting.
Stricker 2 – 3 Bottles Apply at 21 to 28 days after planting


Fall Armyworm (FAW) control

In Nigeria some insecticides are in the market that can control FAW if applied in the first 3 weeks after planting. For example, the chemical called Ampligo or Emacot should be applied once per week for 3 weeks after planting maize. For effective control, use 1 satchet in 20-L knapsack sprayer.

Harvesting

When maize is to be consumed fresh, harvesting should be conducted when the silk has turned brown (50–70 days after planting). But when grain is needed, harvest as soon as the grain is dry enough (80– 110 days after planting) depending on the variety.

Step by Step Rice Production in Nigeria

By Iyorkaa Nater


Site selection

Rice can be grown in two main areas:

  • Lowland areas: These are lowlands on the edges of flooded fadamas (inland valleys) and irrigation schemes where water is available for 4½ to 5 months. In some areas, water may be available for more than 5 months.
  • Upland areas: These are areas with good soil and rainfall of over 700 mm. Select fertile land.


Recommended rice varieties and their Characteristics in the Table below

Variety Adaptation Potential yield (t/ha) Days to maturity Ligule type/ length
FARO 44 Shallow Swamp 7 95–110 Long grain
FARO 52 Shallow Swamp 6 125–135 Long grain
FARO 61 Shallow Swamp 5 100–115 Long grain
FARO 59 Rain-fed Upland 3 95–100 Intermediate
GAWAL R1 Rain-fed Upland 10 90–95 Long grain


Land preparation

Proper land preparation is necessary for rice production to minimize competition with weeds. Two harrowings provide sufficient tilth for rice growth. Ridging is not necessary and is often a waste of space. In places where the soils are more fragile and prone to erosion, minimum or zero tillage is recommended. Where zero tillage is to be adopted, the field should be sprayed with glyphosate at the rate of 4 L/ha to kill emerged weeds. About 10 days after spraying the glyphosate, slash or mow the dead weeds.

Seed rate

It is advisable to use good quality seed from a reliable source for sowing. If the farmers plan to use their own seed, it is important to first sort out unfilled grains before sowing to enhance good germination. Lowland rice: Use 50–60 kg/ ha of seed. Upland rice: About 40–50 kg of seed is required to plant a hectare when sowing is conducted by dibbling.

Time of sowing

The time for sowing rice depends on the available kind of land, whether it is lowland or upland and on the agro ecology where the farm is situated. The recommended time for sowing rice in Northern Nigeria is indicated in Table 2. The actual timing of sowing should, however, be adjusted in accordance with the time of the establishment of the rains.


Time of planting rice in Northern Nigeria

Ecology Time of planting
Southern Guinea savanna Between weeks 1 and 2 in June
Northern Guinea savanna Between weeks 1 and 2 in June
Sudan savanna Between weeks 3 and 4 in June


Spacing

  • Lowland rice: Sow rice seeds by drilling in rows at spacing of 20 cm or 30 cm apart. For transplanting method, transplant seedlings at a rate of 2–3 seedlings per hill, to a depth of 3–4 cm, and at a spacing of 30 × 30 cm (best for late-maturing cultivars), or 20 × 20 cm when soil is fertile or sufficient fertilizer is available.
  • Upland rice: Dibble 5–6 seeds at a spacing of 20 × 20 cm or 30 × 30 cm and later thin to 3 to 4 seedlings per stand at 2 to 3 weeks after sowing.


Fertilizer Application

  • Lowland rice: Apply about 4 bags of NPK 15: 15:15 applied at sowing and about 2 to 3 bags of urea applied at 6‒8 weeks after sowing.
  • Upland rice: Apply about 4 bags of NPK 15:15:15 applied at sowing. Incorporate (bury) the fertilizer in the soil properly to avoid losses. The second dose of about 2 to 3 bags of urea fertilizer should be applied at 6–7 weeks after sowing.


Manual weed control

Weeding should be carried out twice, at 2–3 weeks and 5–6 weeks after sowing. Pull out weeds by hand or with a small hand hoe; heap the weeds outside the field.


Chemical weed control

It is important to note that special skills are required in handling and using herbicides to ensure effectiveness and to avoid poisoning the user. Read and follow the instructions on the product label before using any herbicide. It is important to note that herbicides will not be effective if land preparation is poorly done. Non


Recommended herbicides for upland and lowland rice production

Treatment

formulation

Commercial

name

Rate Time of

application

Remarks
Pendimethalin

(455 g/L)

Stomp CS 2.53 L/ha Pre-emergence Apply within 2−3 days of

planting (for upland and lowland rice). For annual grass

and small-seeded broadleaf weed control.

Propanil + 2,4-D

amine (360+200

g/L) EC

Vespanil plus 1.25−2.5

L/ha

Post-emergence Applied at 1‒4 leaf weed

stage, irrespective of the stage

of the rice or 14‒21 days after

seeding or transplanting.

Selective to rice with broad spectrum

weed control.


Pest and disease control

Pests: The major pests of rice are borers and army-worms

Control: Some of the measures recommended for the control include the use of resistant varieties


Diseases: The major pests of rice are Brown leaf spot and Blast

Control: Some of the measures recommended for the control include the use of resistant varieties


Harvesting

Rice is fully mature for harvesting when 80–85% of the grains are straw color. To harvest, cut the rice stems with a sickle at about 10–15 cm above the ground.


Threshing and winnowing

Thresh on hard surfaces by beating the grains out from the ears. Winnow to separate the chaff and empty grains from the well-filled mature grains. Dry the paddy to a safe moisture level of between 12 and 14% before storing. Freshly harvested paddy does not store well under high temperatures.

Step by Step Oil Palm Production in Nigeria

By Iyorkaa Nater


Site selection

The best soil suitable for cultivating the crop should be deep, well drained, medium textured, non-gravelly and non-lateritic.


Land Preparation

The land preparation operations involve broadly clearing the existing shrubs, felling of the existing trees and burning. These operations should begin 2 to 3 months before the time of burning. The felled trees should be packed or burnt. The land should be ready for planting at the beginning of the rains in April/ May.

After land clearing the field could be lined out with wooden pegs on planting points at a triangular spacing of 9m x 9m x 9m giving a density of about 140 – 150 palms per hectare. The palm rows should run in a north-south direction. This orientation and planting arrangement permit maximum solar interception by the individual palm.

Since the soil is usually left bare after burning, erosion may cause serious problems to the soil. As such it may be necessary to plant legume covers to protect the soil from erosion and to check the invasion of troublesome weeds. The legume cover crops widely planted are Calopogonium mucunoides, Peuraria phaseoloides and Centrosema pubescens. The legumes are sown after the onset of the rains.


Recommended Variety

Tenera hybrid variety from the Nigerian Institute for Oil Palm Research (NIFOR) is recommended for Nigeria across agro-ecological zones for high yield. Sprouted nuts or raised oil palm seedlings which can be obtained through the NIFOR, A.D.P’s and Tree Crops Unit (TCU). Tenera hybrid variety starts fruiting 3 – 4 years after field planting. Relatively, it is resistant to a number of palm diseases and has a yield potentials of 15-18 tonnes fresh fruit bunches (fib) per hectare per year as against 2-3 tonnes of the wild and improved Dura varieties.


Nursery

A nursery is necessary for growing the germinated seeds to produce strong, healthy and viable seedlings for the field establishment. Recommended system of raising oil palm seedlings is the single stage poly bag nursery in which seedlings are grown in polybags until they are ready for transplanting into the field.

The system involves the use of 400- 500 gauge black polythene bags (usually about 40 x 35 cm lay flat). The bags are filled with top soil from the nursery area and placed in square formation at 45 x 45cm spacing. The bags are filled to the top and made firm by watering for a least a week before planting.


Sprouted Seed Planting

When sprouted seedings are received, they are planted almost immediately after their plumule and radicles are well differentiated to prevent planting the seed upside down (planting the seed upside down results in delayed shoot emergence and twisted seedling that never does well). The depth of planting should not be more than 2.5cm, taking care not to damage the radicle and plumule.

Planting starts in mid April and ends in June (when rain stabilises) in order to ensure uniform seedling emergence and good take-off. As soon as planting is done, mulching with partially shredded oil pahn bunch refuse or dry grass.

Seedlings raised in polybags have higher rate of survival, faster field establishment and minimum transplanting shock.


Fertilizers Application in Nursery

Application of a compound fertilizer NPK Mg in the ratio 12: 12:17:2 at the rate of 14g (i.e. one table-spoonful) per seedling per application in two doses at 2 and 8 months after planting is recommended.

The fertilizer should be spread in a ring about 7.5 cm away from the seedling to avoid scorching of the leaves.


Nursery Watering

During the dry season, the seedlings should be watered with 2 litres of water applied in two equal doses per week. A large amount may be required in severe harmattan conditions in which watering may be carried out both in the mornings and evenings daily because oil palm seedlings are vulnerable to any measure of water stress. Mulching also helps to conserve moisture.


Pests of Nursery

The three main insect pests of oil palm nursery are termites, grasshoppers and beetles.

  1. Termites: They attack and destroy the root system of seedlings in the soil which cause the seedlings to be pale, stunted or dead in heavy infestations. Termites can be controlled culturally by increasing the frequency and volume of watering during the dry season from November to onset of the next rainy season. Termites can also Furadan 3G at 1 Og/seeddling (1 tea spoon) or ultracide 40SCW at 6% concentration.
  2. Grasshoppers: These feed on the leaves and can cause considerable deterioration to nursery seedlings. The young nymphs are the most destructive stage of these Grasshoppers can be controlled by handpicking and destroying the nymphs at low infestation intensity or by spraying of a good insecticide.
  3. Beetles (Small Weevils): The adult weevil lays eggs on cut parts or tiny holes, it finds on the petioles, leaf bases or bulb of seedlings. The eggs later develop into larvae which eat through the affected parts of the seedling. In severe cases the affected part will cause wilting and later death of the seedling.

In order to minimize its attack, it is advisable to provide light shading during the dry season or period of drought during July- August. The insect can also be controlled culturally by avoiding wounding any part of the seedlings. It is advisable to uproot affected seedlings and burn. Chemical control of the insect is by spraying with a good insecticide.


Transplanting to the Field

The Ball-Of earth method of transplanting is the best method. Polybag seedlings are best transplanted with all the soil in the bag. Transplanting of seedlings should commence when they have attained the age of 10 – 12 months. The operation should start as soon as the rains become regular and be completed at least 2 months before the rains cease.


The following steps are involved in this method of transplanting:

  1. Dig hole big enough to accommodate ball-of-earth
  2. 2. Separate top soil from sub-soil
  3. Lift polybag seedlings carefully to planting point to avoid disturbing the ball-of-earth.
  4. Tear off polybag carefully and slide ball-of-earth into planting hole
  5. Make sure that surface of ball-of-earth levels up with soil surface
  6. Fill gap with top soil and ram gently with stick to avoid water logging and ensure firm establishment of seedling.


Weed Control

Always maintain a clean field especially round the plant


Harvesting

Oil palms can be harvested the 4th year after planting if they are given the proper care and management. The correct time to harvest bunches is when a few of the fruits become loose and can be dislodged.

NOTE: Always contact your nearest Farm Warehouse office for advice when you observe changes in leaf colour and yield

Step by Step Cassava Production in Nigeria

By Iyorkaa Nater


Site Selection

  • Choose a good soil with medium fertility and good drainage
  • Avoid stony, clayey or water-logged soils
  • Use a farm that has been well maintained
  • Use land that is not sloppy

Land Preparation

  • Clear the weeds with Glyphosate 3 weeks before tillage operations
  • Practice minimum tillage in sandy soils to conserve organic matter, and moisture, and to reduce soil erosion
  • In shallow or hard soils, make ridges or mounds to increase the topsoil volume per plant for a better establishment

Choice or Variety

  • Select planting materials from healthy cassava plants (9-15 months old) without stem or leaf damage from pests or diseases
  • Choose improved varieties with the highest and most stable yield performance in the particular farm locations

Cassava Varieties Available for Farmers in Nigeria

Variety Characteristics
Game – Changer High Yielding, High Starch Content
Hope High Yielding, High Starch Content
Obasanjo – 2 High Yielding, High Starch Content
Baba – 70 High Yielding, High Starch Content
Poundable Sweet Cassava, High Yielding, High Starch Content
TME-419 High Yielding, High Starch Content
TMS 30572 High Yielding, High Starch Content


Preparing healthy cassava stems for planting

  • Obtain stems for planting from mature plants 10–12 months old
  • Store under the shade for 2–5 days (never more than 2 weeks) before cutting and planting. This makes the stems sprout faster than when they are planted freshly cut from the field
  • Stems should be stored vertically on the soil under a shade. The distal end of the stems should touch the soil, which is moistened regularly, with the surroundings kept free from weeds
  • Handle the stems with care not to destroy the nodes that may result in losses. Do not make jagged cut surfaces or keep stems in the open (leading to drying)
  • Cut stems, with sharp tools, preferably secateurs or cutlasses, into 25-cm cuttings with 5–7 nodes

How to plant cassava cuttings

  • Cassava cuttings can be planted in a slanting or angular position (45o). In this case, the cuttings are buried in the soil with one-third above the soil surface. Ensure that the buds point upwards. This is where the cuttings sprout
  • Plant the cuttings at a spacing of 1 m × 1 m on the crest of ridges or mounds as conventionally recommended. This will give a plant population of 10,000 stands/ha
  • Vertical or angular planting is recommended in areas of high rainfall
  • Horizontal planting is better in dry areas

Weed control practices in cassava production

  • Weeds are controlled so that cassava grows and develops well.
  • Control weeds in the first 3-4 months after planting

When and how to apply chemicals

Pre-planting: Apply herbicides such as Glyphosate 7-10 days before planting

Pre-emergence: Apply herbicides such as Primextra Gold or Vigor at 4 liters per ha or Lagon at 1.25 liter per ha.

Do not apply pre-emergence herbicides on dry soil

Post-emergence: Use Fusilade Forte 150EC recommended at 3 L/ha at 12 weeks after planting, for grasses. Apply Gold, Basta, Fasinate under cassava canopy at label rate (spray) 8 weeks after planting (early post emergence) for broad leaved weeds. Avoid direct or drift damage to the crop

Fertilizer Application

Application of N-P-K 15-15-15 (15 bags) per hectare in three doses is recommended for higher yield. Ensure covering of applied fertilizers to avoid evaporation

  • First dose 3 bags per hectare at 4-6 weeks after planting
  • Second dose 3 bags per hectare at 10–12 weeks after planting
  • Third dose 3 bags per hectare at 16–20 weeks after planting

Harvesting

  • Harvest cassava roots when they are mature to have accumulated enough starch but have not yet become fibrous.
  • The optimum age when the starch and dry matter yields are highest is 9 – 12 months after planting, depending on the variety and the climate. Some varieties mature in 15 – 18 months. Extended cold season may delay the maturity of cassava
  • Cassava roots may lose the valuable starch, rot or become woody if not harvested at maturity
  • When harvesting, cut the roots from the stem leaving 2-5cm of the stuck on the roots

Transporting cassava roots

To avoid root deterioration and loss of quality, transport to the homestead, market or processing plant immediately after harvesting

How to transport cassava roots

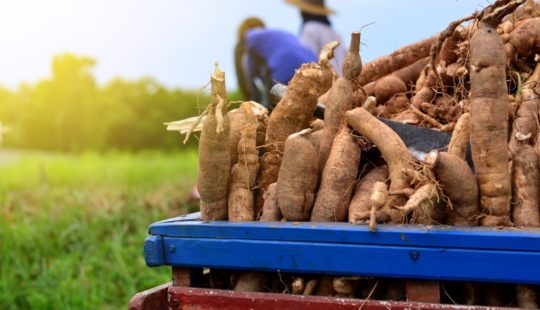
  • Use wheel barrows or any other suitable container to transport roots in small quantities and short distances, such as from the farm to road side or bulking center where they will be loaded on a vehicle for long distance transportation.
  • Gently off load the roots from the wheelbarrow or container without causing bruises or damage to the roots
  • Vehicles transporting cassava a long distance should be covered with tarpaulin to avoid rapid moisture loss from the roots
  • Do not seat or put heavy objects such as vehicle tyre s on roots after loading.

Storing cassava roots

Cassava roots start deteriorating soon after harvesting. Internal discoloration and loss of marketing value occur if they are not cooked or processed within 24 – 48 hour of harvesting. Secondary fungi and bacteria infection may cause rot in untreated roots

Improved storage methods

  • Select a well-drained area, preferably shaded, and slightly sloping.
  • Dig trenches measuring 1 meter (m) wide and 30–40 cm deep. The length varies according to the volume of roots. A trench 1 m long can contain 70–80 kg of roots
  • Dig the trenches in such a way that the length is directed downhill
  • At the lower end of the trench, make a drainage ditch, at least 20 cm wide and 5 to 10 cm deeper than the storage trench
  • Arrange mature, undamaged roots inside the trench. Cover each layer with soil, preferably river- sand or sea- sand. Clay-loam soil can also be used if it is not too wet
  • Do not use heavy clay. Soil of this type could speed up root deterioration
  • Do not keep cassava in a waterlogged area because roots will rot easily.